Overview
This article explains how to upload a custom ISO or image to your CloudPe account and then create a virtual machine (VM) using that image.
Uploading your own image allows you to install your preferred operating system, use pre-configured templates, or migrate an existing on-premise setup to CloudPe.
Step 1: Upload Your Custom Image
1. Log in to your CloudPe account.
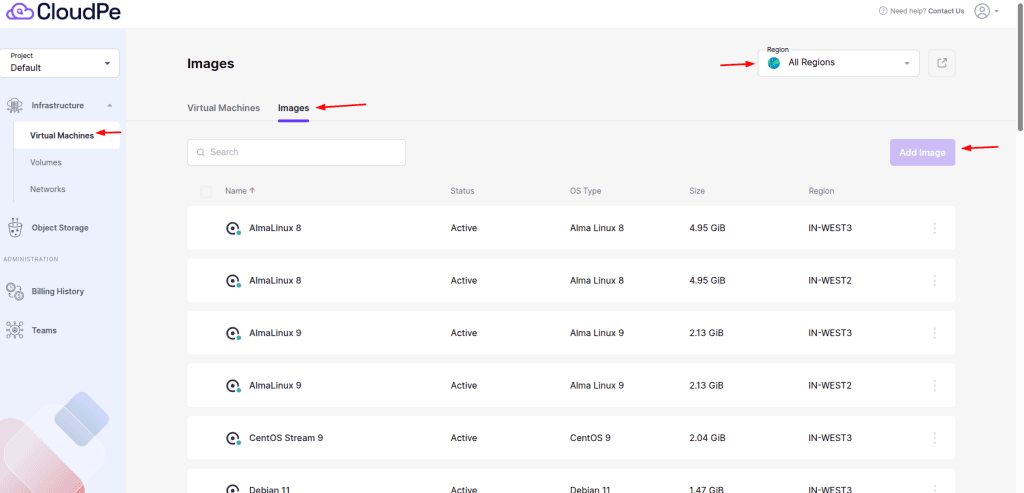
2. In the left-hand menu, navigate to Virtual Machines → Images.
3. Select the region where you want to upload the image.
4. Click Add Image.
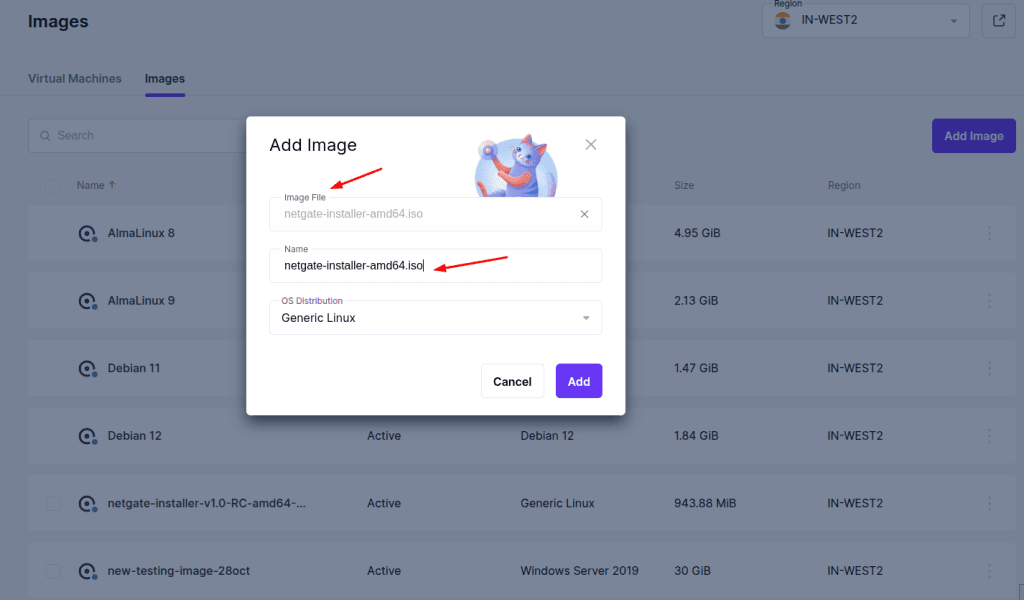
5. Choose your custom ISO/image file from your local system and click Add to begin the upload.
Note: Upload time may vary depending on image size and network speed.
Step 2: Verify the Uploaded Image
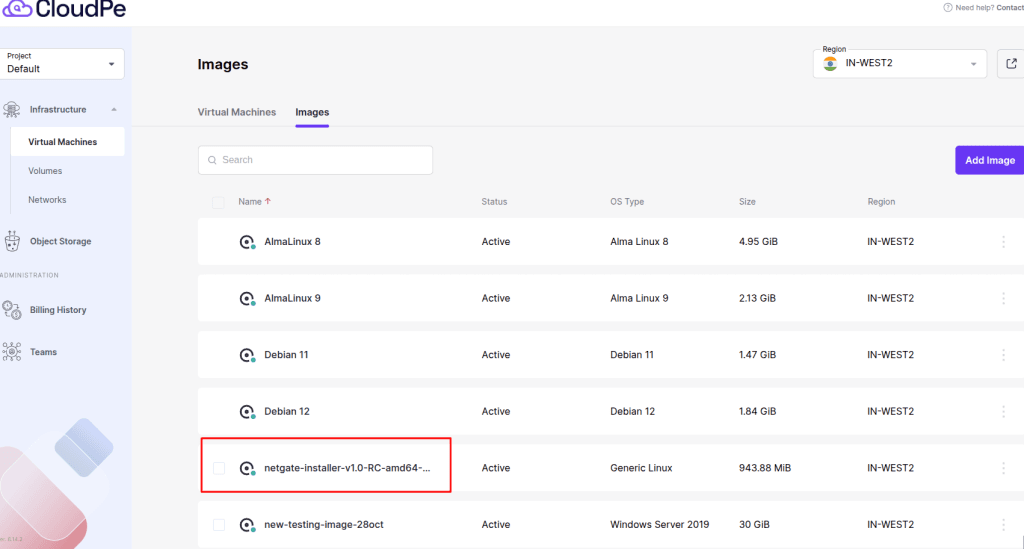
1. Once the upload completes, go to Virtual Machines → Images.
2. Confirm that your image appears in the list with status Available or Ready.
3. If the status shows Processing, wait until the upload is complete before deploying.
Note :- Use a descriptive name for your image (e.g., Ubuntu-22.04-CustomApp.iso) to identify it easily during deployment.
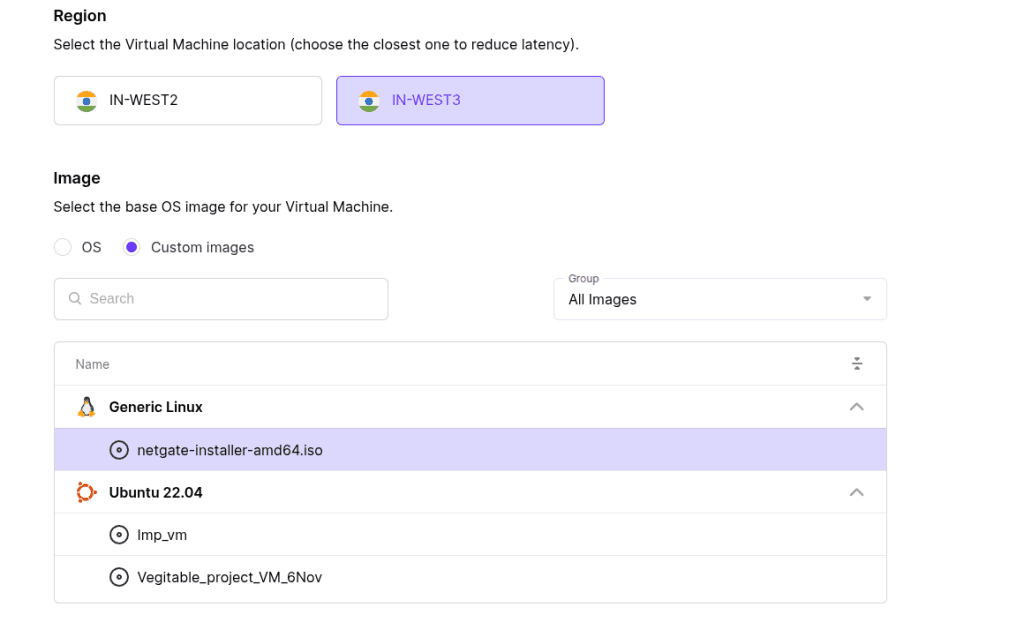
Step 3: Create a Virtual Machine Using the Custom Image
1. Choose the same region where your image was uploaded.
2. Navigate to Virtual Machines → Create VM
3. From the image section, select the custom image you uploaded earlier.
4. Configure other settings:
Server Type: Choose the compute plan (CPU and RAM).
Storage: Adjust the disk size
Network: Select private/public network interfaces as needed.
Name: Set a custom name for your Virtual Machine.
Access: Add SSH keys or set a root password.